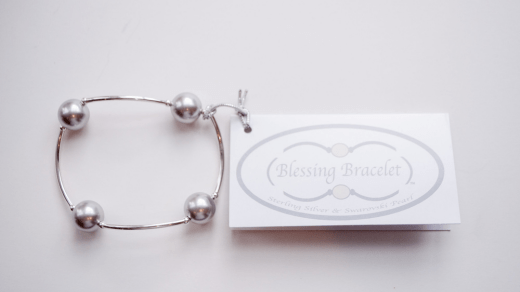
Blessing bracelets are meaningful and often spiritually inspired pieces of jewelry. They are typically made with specific intentions or blessings in mind. Here’s how you can make your own blessing bracelets:
Materials You’ll Need:
- Beads: Choose beads that have significance to you or relate to the intention or blessing you want to infuse into the bracelet. You can use gemstone beads, glass beads, wood beads, or any other type that resonates with you.
- Stretch Cord: Use a strong and durable stretch cord, like elastic cord or jewelry stretch cord. Make sure it’s the right size to fit through your beads easily.
- Clasp (optional): You can use a clasp if you prefer a bracelet that can be easily taken on and off. Lobster clasps or toggle clasps work well.
- Scissors
- Ruler or measuring tape
- Crimp beads (optional): If you’re using a clasp, you may need crimp beads to secure the ends of the cord.
Instructions:
1. Choose Your Intention:
- Decide on the intention or blessing you want to infuse into your bracelet. This can be a personal affirmation, a prayer, a word, or a specific theme like love, peace, or protection.
2. Select Your Beads:
- Choose beads that align with your intention. Different gemstones are often associated with specific meanings and intentions. For example, amethyst can symbolize peace and spiritual growth, while rose quartz is associated with love and compassion.
3. Measure Your Wrist:
- Measure your wrist to determine the length of the bracelet. Add a little extra length for comfort. Most blessing bracelets are made to fit snugly but not too tight.
4. Cut the Stretch Cord:
- Cut a piece of stretch cord to the desired length. Make sure it’s long enough to fit comfortably around your wrist when the beads are strung.
5. Begin Stringing Beads:
- Start stringing your chosen beads onto the cord in the order you prefer. You can alternate different types of beads or create a pattern that resonates with your intention.
6. Add Your Blessing or Intention Bead:
- Include a special bead or charm that represents your chosen intention. This can be a larger bead or a unique charm that stands out.
7. Complete the Bracelet:
- Continue stringing beads until you’ve reached your desired bracelet length. Make sure it comfortably fits your wrist.
8. Finish the Bracelet (With Clasp, If Desired):
- If you want to add a clasp, attach one end of the stretch cord to the clasp using crimp beads or other suitable connectors.
- String the other end of the cord through the clasp, adjust the length, and secure it with crimp beads.
- Trim any excess cord.
9. Tie Knots (Without Clasp):
- If you’re not using a clasp, tie a secure knot with the two ends of the cord, making sure the bracelet is the right size to slip on and off your wrist.
10. Charge Your Bracelet: – Hold your bracelet in your hands and focus on your intention or blessing. You can say a prayer or affirmation while holding it to infuse it with your desired energy.
11. Wear and Enjoy: – Wear your blessing bracelet daily as a reminder of your intention or blessing. You can also give it as a meaningful gift to someone special.
Blessing bracelets can be deeply personal and meaningful, serving as a reminder of your intention or blessing as you wear them throughout the day.


